The 2018 GMC Terrain is a reliable and versatile SUV known for its modern features and solid build. However, like any modern vehicle, it includes advanced systems that require specific procedures when performing maintenance. One critical area that often confuses even experienced DIYers and technicians is the 2018 GMC Terrain rear brake service mode.
If you’re planning to replace the rear brake pads, rotors, or calipers, you must put the rear brakes into service mode due to the vehicle’s electronic parking brake system. Failure to do so could result in damage to the electronic actuator, triggering costly repairs.
Read too: Port Authority Snapback Trucker Cap: The Stylish and Practical Headwear You Need Today
This comprehensive guide will walk you through everything you need to know about 2018 GMC Terrain rear brake service mode—including how it works, why it’s necessary, how to activate it, and step-by-step instructions for successful rear brake maintenance.
Why the 2018 GMC Terrain Requires Rear Brake Service Mode
Before diving into the “how-to” process, it’s essential to understand why the 2018 GMC Terrain rear brake service mode is necessary in the first place.
The Role of the Electronic Parking Brake (EPB)
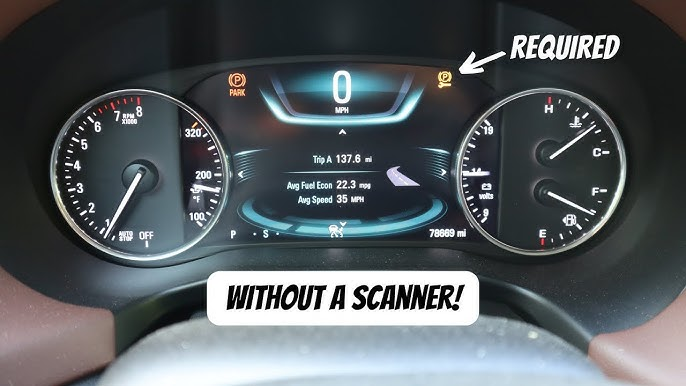
The 2018 GMC Terrain comes equipped with an Electronic Parking Brake (EPB) system. Unlike traditional mechanical handbrakes, EPB uses an actuator motor on each rear caliper to engage and disengage the parking brake electronically.
When you’re doing rear brake work—such as changing the pads—the EPB must be disabled or put into service mode. This is to:
- Prevent the actuator motor from engaging during maintenance
- Avoid damaging the caliper motor or triggering error codes
- Safely retract the pistons to install new brake components
Without putting the system into service mode, attempting to compress the rear caliper pistons can result in significant damage.
How to Enter 2018 GMC Terrain Rear Brake Service Mode Step by Step
Activating the 2018 GMC Terrain rear brake service mode is fairly straightforward when you follow the correct sequence. This section covers both manual and scan tool-assisted methods.
Method 1: Using a Diagnostic Scan Tool (Preferred Method)
The easiest and safest method to enter rear brake service mode is by using an OBD2-compatible scan tool that supports EPB functions (e.g., Autel, Launch, or Snap-on tools).
Step-by-Step:
- Park the Vehicle on a Flat Surface
Ensure the Terrain is in park (P) and on a stable, flat surface. Set wheel chocks for safety. - Turn the Ignition to “On” Position
Do not start the engine. Simply turn the ignition key or push-button start to the ON/RUN position. - Connect the Scan Tool
Plug your scan tool into the OBD-II port located under the dashboard (driver’s side). - Navigate to EPB Functions
On the scan tool menu, select:
→ GMC → Terrain → 2018 → Electronic Parking Brake (EPB) - Select “Brake Pad Replacement Mode” or “Service Mode”
The tool will prompt the actuators to retract the rear calipers, disengaging the EPB. - Wait for Confirmation
You’ll hear the motors retracting. Once complete, a confirmation will display on the tool. - Proceed with Brake Service
You can now safely remove the rear wheels and replace pads, rotors, or calipers.
Method 2: Manual Activation Without Scan Tool (Not Always Available)
If you don’t have access to a scan tool, some users report limited success with a manual procedure—though results may vary and it’s not officially recommended by GM.
Possible Steps (if available):
- Turn the ignition on (engine off).
- Press and hold the Electronic Parking Brake switch (EPB) down.
- Wait for the “Service Mode Active” message to appear on the dashboard.
- Once confirmed, proceed with brake service.
⚠️ Note: This method may not work on all trims or software versions of the 2018 GMC Terrain. A scan tool is strongly recommended.
Rear Brake Maintenance Tips While in Service Mode
Once you’ve activated the 2018 GMC Terrain rear brake service mode, keep the following best practices in mind during service:
1. Do Not Manually Retract the Piston Without Deactivating EPB
If the caliper is still engaged, forcing the piston could damage the motor.
2. Replace Pads in Pairs
Always replace rear brake pads on both sides of the axle to ensure even wear.
3. Inspect the Rotors and Calipers
Check for scoring, rust, or seized caliper slides. Replace or service as necessary.
4. Use High-Temperature Brake Grease
Apply it to the pad backing and caliper pins to ensure smooth operation.
Exiting the 2018 GMC Terrain Rear Brake Service Mode
After completing the brake job, you need to exit service mode and re-engage the EPB system properly.
Step-by-Step:
- Reinstall Wheels and Lower Vehicle
Torque lug nuts to manufacturer spec. - Turn Ignition On
Once again, ensure the vehicle is in RUN mode (engine off). - Use Scan Tool to Complete Service
Navigate to EPB functions and select “Exit Service Mode” or “Apply Rear Brakes”. - Test EPB Functionality
Apply and release the electronic parking brake using the switch. You should hear the calipers re-engage. - Test Drive
Perform a gentle test drive to confirm braking performance and ensure no warning lights appear.
Common Mistakes When Servicing 2018 GMC Terrain Rear Brakes
To help avoid costly errors, here are the most common mistakes made during the rear brake service mode process:
- Skipping service mode entirely
- Trying to compress the caliper piston manually
- Leaving the EPB engaged during service
- Not performing a post-service calibration
- Failing to torque components to spec
Troubleshooting: What If Service Mode Fails?
If you’re having trouble entering or exiting the 2018 GMC Terrain rear brake service mode, try the following:
1. Check the Scan Tool Compatibility
Not all OBD2 scanners have EPB functionality. Ensure yours supports GMC and brake service features.
2. Battery Voltage
Low voltage can interfere with electronic functions. Make sure the battery is charged above 12.5V.
3. Inspect Fuses
Check fuses related to the EPB system in the fuse box. A blown fuse may prevent the system from responding.
4. Error Codes?
If warning lights appear, scan for DTC (Diagnostic Trouble Codes) and clear them after repairs.
Why DIYers and Technicians Must Understand This Procedure
As automotive technology evolves, more manufacturers are integrating electronic systems into essential components like brakes. This requires new knowledge and tools, even for seasoned DIYers.
The 2018 GMC Terrain rear brake service mode isn’t just a technicality—it’s a vital safety step that protects the system from damage and ensures reliable braking performance.
Final Thoughts: Keep Your 2018 GMC Terrain Running Safely
If you’re planning to service your own brakes on a 2018 GMC Terrain, understanding and correctly using the rear brake service mode is essential. Skipping this step can lead to expensive repairs and unsafe driving conditions.
With the proper tools, steps, and safety practices, you can complete your brake service like a pro while extending the life of your vehicle’s electronic systems.
Leave a Reply